Form Layouts
In Site Manager, the forms for the different LS POS printouts are created and maintained.
An example of forms that the LS POS uses are, Customer Receipt and Voided transaction printout.
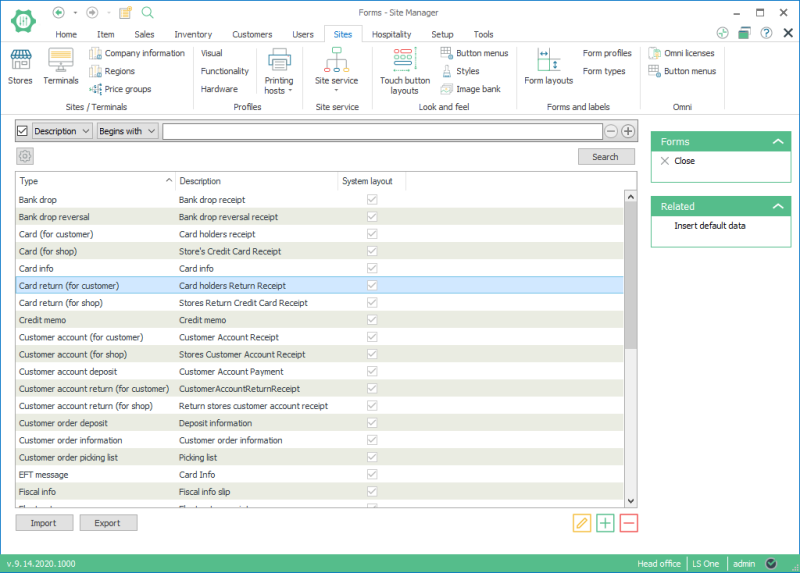
To open Form layouts select Sites > Forms and labels > Form layouts

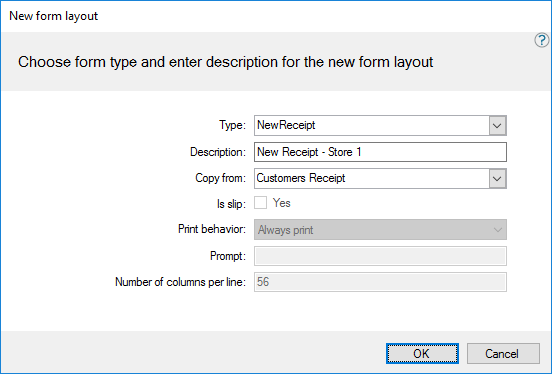
To add a new form layout, click the  button. When a new form is created, its type is configured. The user can choose to configure a form of system type or a form of user defined type. A list of the system types can be seen here.

The most used form in the LS POS is the receipt. The following chapter explains how to work with the receipt form; working with other forms is very similar.
The Site Manager provides a tool to create and customize each form. The tool is activated when the form is opened.

- One form layout can be used in more than one form profile.
- A form layout cannot be deleted if it’s in use in one or more form profile.
To open the Form layout tool, edit one of the forms.

Active section
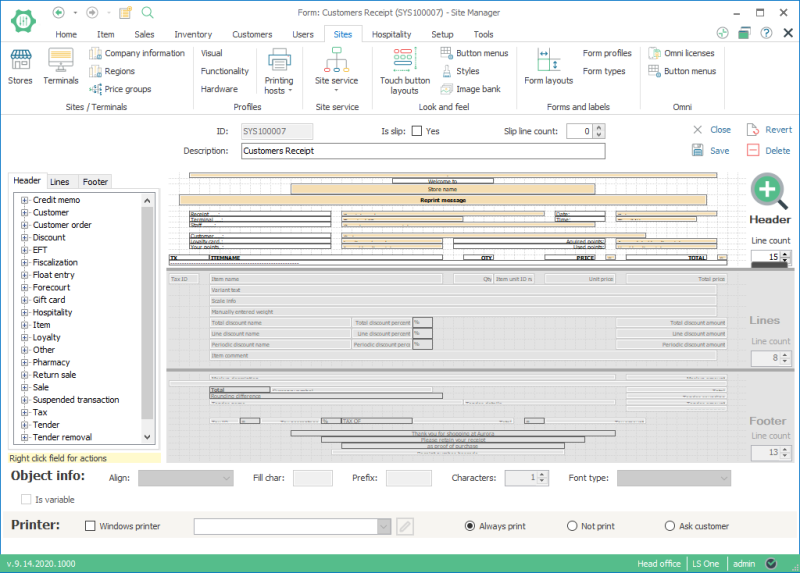
The receipt is divided into three main sections. The header, the lines and the footer.
The header contains information on the store, terminal and staff member responsible for the sale
The lines section include all the sales lines and is repeated for each item sold. In the line section the item sales line is set up. Usually it is one line but here additional lines is added so that extra information such as discount and item comments are printed if the information exists.
The footer contains all totals, tax information and any other message from the store.
- On the left hand side you can select which section is active by selecting one of the tabs: Header, Lines or Footer.
- The selected part of the receipt is white the others are disabled and gray.
- In each of the tabs you see a selection of objects that can be dragged to your receipt layout. These are the objects that can be printed on the form. The objects menu is different depending on the active section.
- Each section can be resized by dragging the dividers up and down. Resizing does not affect the appearance of the printed form, it is only for ease of use while designing the layout.
- Each section can be viewed in full size by selecting the area and click on the zoom in/out icon.
- Sections can only be worked with when they are active. Activate sections by selecting the section tab you want to work with.

All the same objects can be added to the header and footer

The receipt layout is the only layout that requires all the three sections, most layouts only need the header section.
Section lines
Each section consists of one or more lines.
- In a new layout there is one line in each section but new lines can be added to all sections by increasing the line count of that section and editing the Line count field.
- On an active area, right click on an empty space to select the number of columns, insert row above or below the clicked row or delete the row.
Objects
An object is dragged to the form for each text string or variable that should be printed:
- On an active area, right click on an object to delete it or to move it to front or back.
- To add an object to a section, drag it over to the section and place it where it is supposed to be.
- Each object can be of a fixed size. Change its size in the object info part, in the characters field. Other fields in the object info part can be used to change how the fields will be displayed in the printout. Note that with fill chart, the white space field has to be deleted and the prefix symbol is only displayed in the printout.
- Each object can have a different font type. To set the font type of an object, click on it and on the object info part, select the font type from the dropdown list. The available font types are: Regular, Double wide, Italic, Underline, Bold, Double underline, Double high, Double high and wide, Reverse video, Shaded.
- The object Text is for any free text which is put onto the form.
- When you click on a text field, the box will be highlighted and the cursor will be blinking.
- Other objects, apart from text, are for data variables in the LS POS. An example of this is that Store name is for the name of the store, Receipt number is the receipt’s number and so on.
- To differentiate the text field form the data field, the system shows them in different colors. Text fields are white and the variables are yellow.

Some of the objects only print data in the LS POS when the data exists. An example of this is Item comment, no line is printed when no item comment exits.
Printing options
Is slip: if this field is checked the form will be printed on the endorsement printer if the receipt printer has one of those.
Windows printing: If this form should not be printed on the printer selected in the hardware profile you can check the windows printer checkmark and enter the windows printer driver name to the text field.
Always print, Not print, ask customer option decides if the receipt or other print form should always be printed without asking, if the user should select to print the form or not or if the form should never be printed.
When the form is finished, save it with the action Save.
The following figure shows an example of the receipt as it has been set up in the Demo Data:

You can import or export form layouts by using the buttons located at the bottom left of the forms grid. A file dialog will be shown where you can select the form layouts to import or select the location where to export the selected form layouts.
| Last updated: | June 2020 |
| Version: | LS One 2020 |

